PayPal Standard takes customers from your site to PayPal’s secure site to finish paying for their order.
What do you need to do? Ensure that your host supports HTTPS connections through CURL/fsockopen using TLS 1.2 or newer certificates. Your system status page in WooCommerce tells you if there are issues connecting. Contact your host to fix, if needed.
Requirements
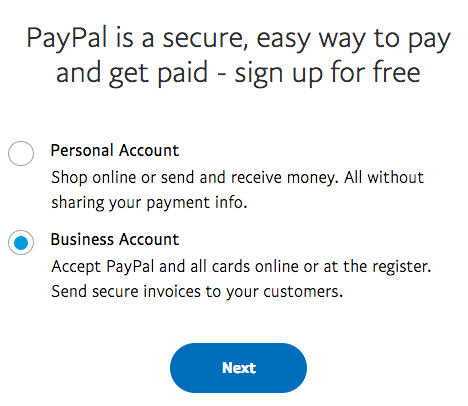
- A PayPal Business account
Go to paypal.com and sign up for a PayPal Business account or convert an existing Personal account to Business. It’s free.
Setup and Configuration
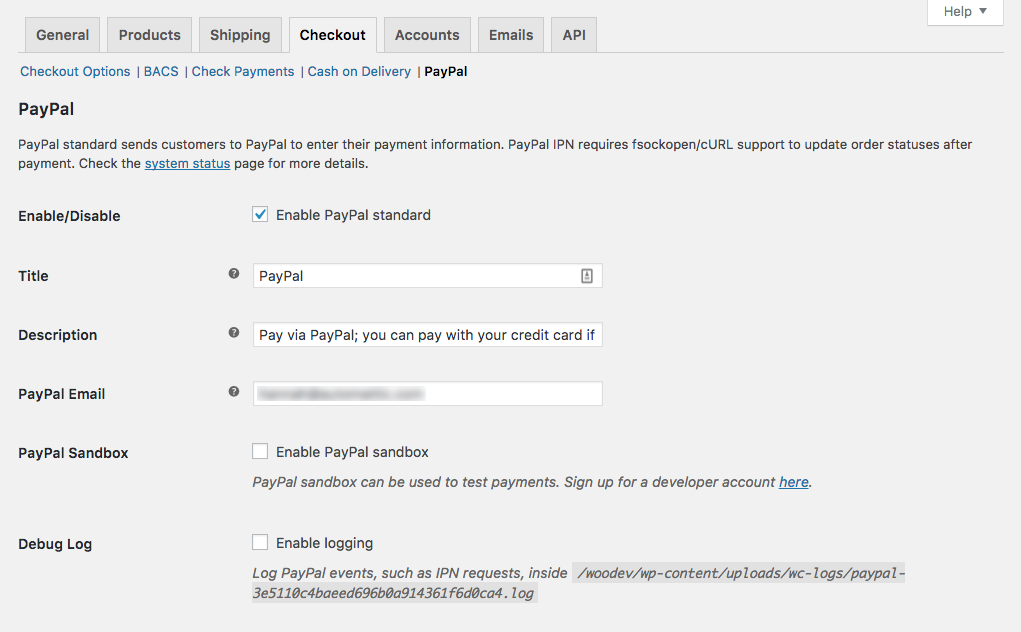
To set up PayPal Standard:
1. Go to: WooCommerce > Settings > Checkout > PayPal.
2. Tick the Enable PayPal Standard if you’re ready to go live.
3. Enter a Title and Description shown to customers in checkout.
4. Enter your email address in the PayPal Email field, which is the most important thing to configure before taking payments. Must match the same email address on your PayPal Business account.
5. Tick the Enable PayPal Sandbox checkbox if you wish to test the checkout process during your store’s development. With sandbox enabled, no payment/money is taken. To use Sandbox mode, you need a separate sandbox account via PayPal Sandbox.
6. Debug logs may also be turned on, which can be useful during development. You may need to first create a wc-logs folder and set permissions to make it writable. These logs are available at WooCommerce > System Status > Logs and then select the PayPal log from the dropdown.
Advanced Options
Under Advanced Options, complete fields as needed.
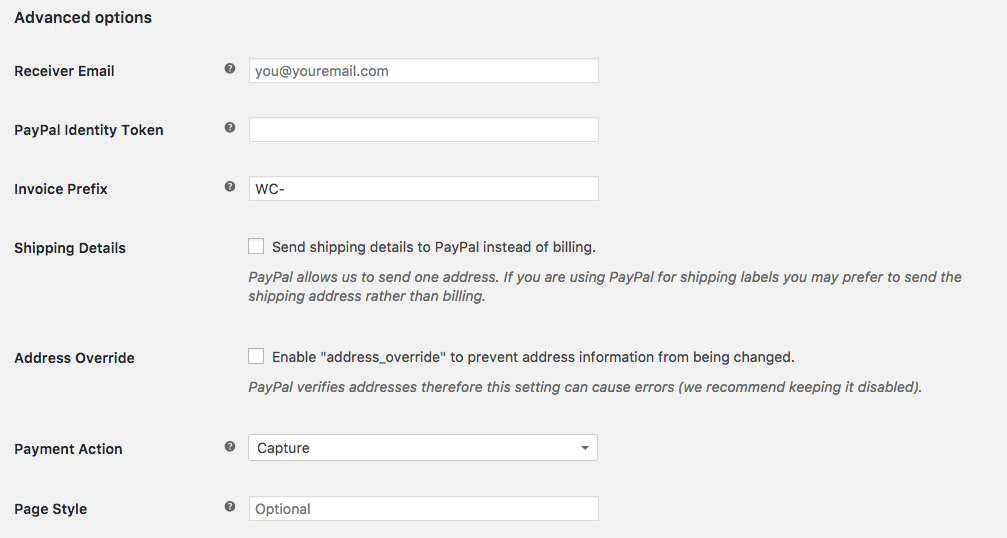
There are two shipping options:
- Send shipping details to PayPal. You can opt to have WooCommerce send shipping details to PayPal to create shipping labels instead of billing.
- Address override option. PayPal verifies addresses therefore this setting can cause errors. We recommend keeping it disabled, but it can be useful in preventing address information from being changed.
These fields can also be useful:
- Receiver Email can be used if the email address that receives payments is different from the primary email address on your PayPal account.
- Invoice Prefix to add a prefix to PayPal invoices. This is helpful if you’re using the same PayPal account for more than one website/store.
- Payment Action lets you choose to capture funds immediately or only authorize.
- Page Style is an optional setting where you can enter the name of a custom page from your PayPal account.
- PayPal Identity Token can be used to verify payments if you have IPN issues.
API Credentials
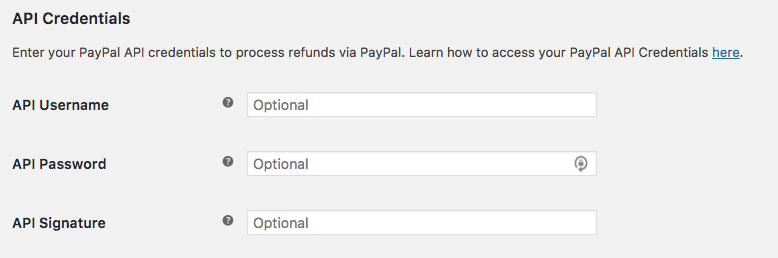
There are three fields to paste the API information into:
- API Username
- API Password
- API Signature.
Learn how to get the API information from PayPal here.
Configuring the PayPal dashboard
Most of the configuration is handled from WooCommerce, but there are a few items to set up at PayPal.
PayPal IPN URL
It’s good practice to set up your PayPal IPN URL.
PayPal Instant Payment Notifications (PayPal IPN) tells your store that payment has been successful (or not). To learn more about how to set this up on PayPal, see: How to Activate IPN in your PayPal Account. There can be only one IPN URL set for a PayPal account, so you need to use an account that is not already using an IPN for any other purpose.
In your PayPal Business account, go to: Profile > Profile and settings > My selling tools. Click on Instant payment notifications to set your URL.
Use the following, replacing example.com with your own URL:
http://example.com/?wc-api=WC_Gateway_Paypal